This function enables you to view the history of the payments rejected during the import of the file from the external system.
The rejected payments are not integrated like the others, but stored in the history with their reject reasons which specify the missing information or the information inconsistent with Sage XRT Treasury data repository.
Different kinds of error can generate rejects: data that are mandatory but missing or that do not have their equivalences in the database (which is the case for the information referenced in the repository such as Currency Codes, Company Codes...).
The reject history includes all information on the rejected payments, including reasons for reject. You can view this history, correct errors and re-import the rejected payments.
Before correcting manually the rejected payments, make sure that the file structure is properly set up. For more information, refer to topic Exchanged Files Structure.
In the Modules Tasks pane, select the Payment Type Rejects option from the Import/Export folder of the Payment module.
The management page for Rejects is displayed with the list of the rejected payments in a table.
This table presents the reject reasons and information on the payments.

Info
All payments are selected by default. If you want to cancel this selection and select a specific line, deselect the first option of the table and select the option on the relevant line.
In the management page for Rejects, select the line(s) to display and click the View button.
The detailed information on the first selected payment and the reasons for reject are displayed on a new page.

- If you selected several payments to view, click the Next Entry button to view the following payment.
- If, for the selected payment, there are other error messages that are not displayed on the current page, use the Previous Error Message and Next Error Message buttons to display the corresponding pages.
- To go back to the management page for Rejects, click the Cancel button.
- In the management page for Rejects, select one or several payments and click Change in the actions toolbar at the top of the page.
The detailed information on the first selected payment and the reasons for reject are displayed on a new page.
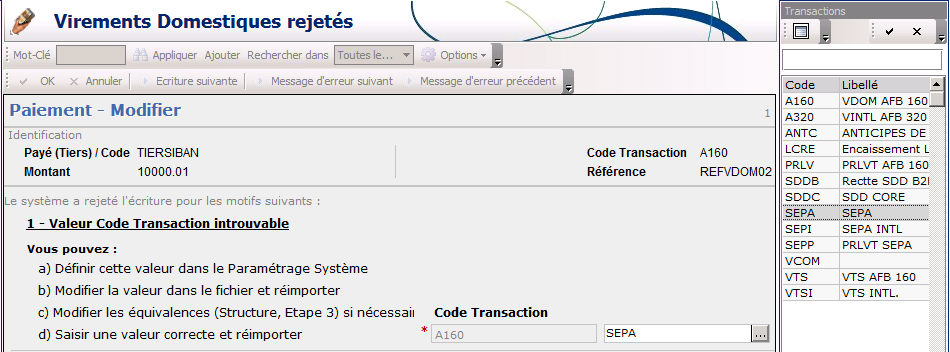
For each error message, an entry field enables you to correct the faulty value.
- Correct each incorrect data by entering a new value in the entry field, or by using the button
 to select a value in the list.
- If, for the selected payment, there are other error messages that are not displayed on the current page, use the Previous Error Message and Next Error Message buttons to display the corresponding pages.
- If you selected several payments to correct, click the Next Entry button to view the following payment.
- Once the correction is completed, click OK to save your modifications or Cancel to cancel them.
The management page for rejects appears.
Now that your payments are corrected, you can relaunch an import task for them.
In the actions toolbar of the management page for Rejects, click the Purge button, then OK in the dialog box of purge confirmation.
The history of rejected payments is purged.
Info
This is an irreversible action. Before purging the history of rejected payments, make sure that this information will not be needed later on.
- In the actions bar of the management page for Rejects, click Process, then Import.
The import is launched and a new page is displayed showing the task progress.
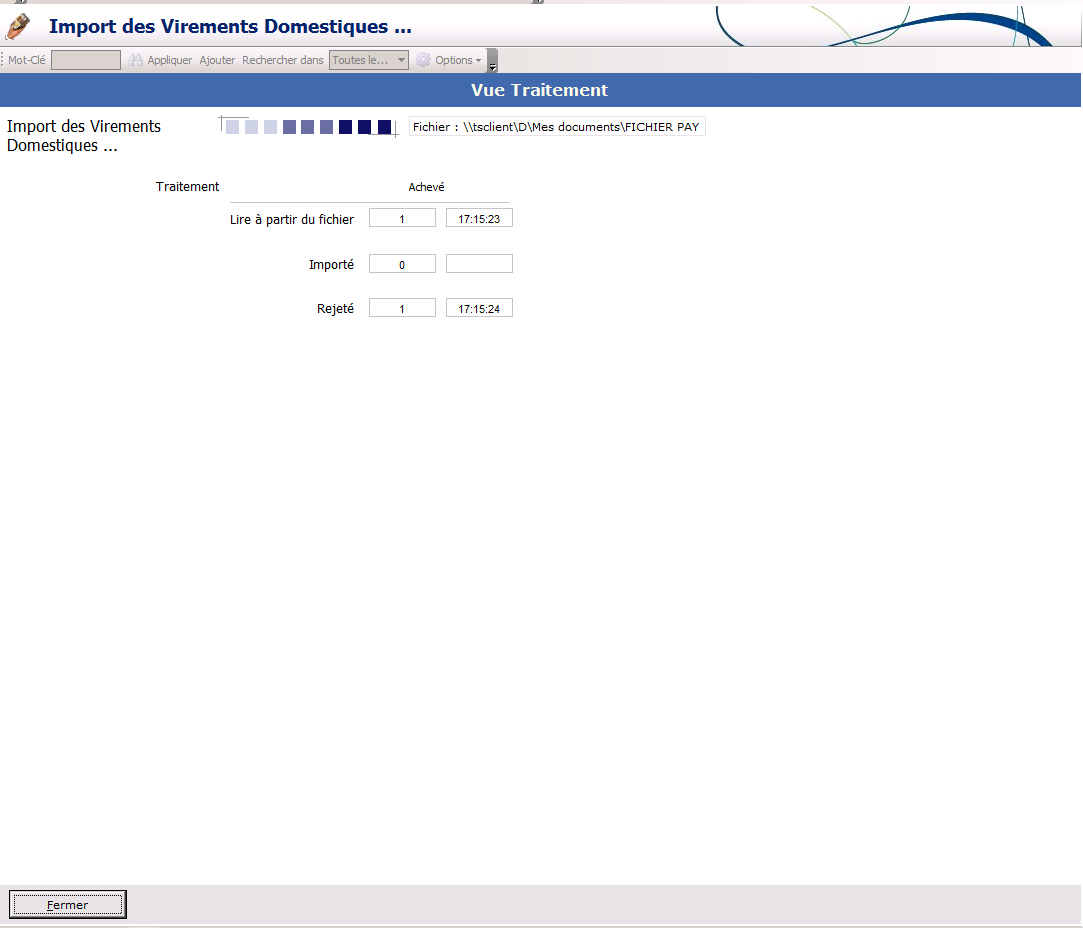
- Once the task is completed, click the Close button at the bottom of the page.
The management page for Rejects is displayed again. The list of the payments with errors, is updated since the last import.
The corrected payments that were re-imported properly into Payment module, are deleted from the list.