The setup for the structure of an external file consists in defining:
- the type of data in the file
- the data location in the file
- the correspondence between the data and the database through a correspondence table, when codes are different in the file or in the database
In the Modules Tasks pane, select the Import Budget Structure option in the Setup folder of the Liquidity module.
The setup page for the file structures is displayed with the list of set up structures in a table. The table shows the code and description of each structure, as well as the relevant function type, the expected date format, the standard length of transactions in characters and the presence or absence of value equivalences in a correspondence table.

For more information on:
- Reorganization of the lines display in the table, click here
- Text search in the table, click here
- How to create lines, see the topic below
- The structure or equivalences modification in the table, click the Modify the structure or Modify the equivalences buttons. You can access the same pages as in creation mode.
- How to delete lines in the table, click here.
- In the setup page for file structures, click the Create button.
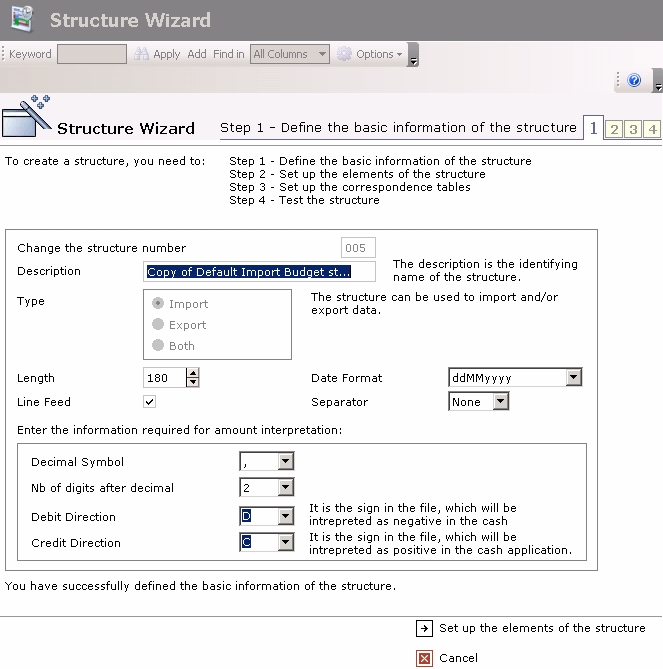
The first page of the Structure Wizard opens up.
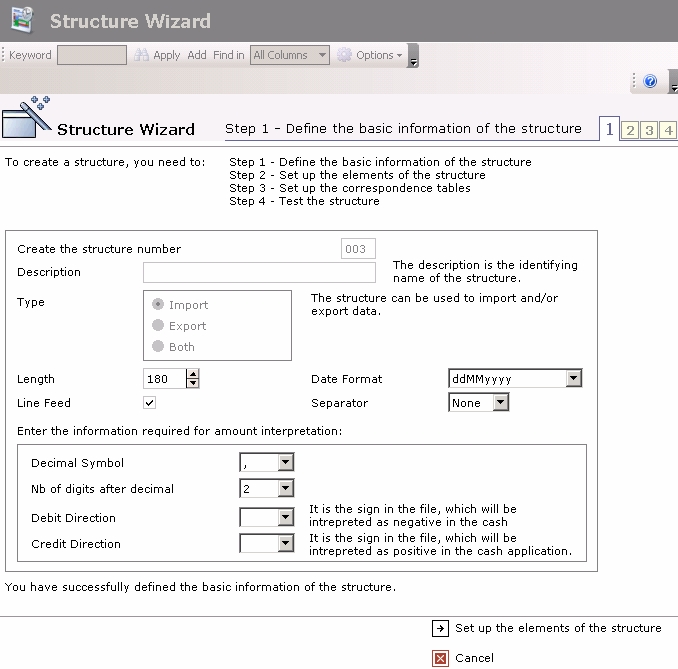
- Enter the structure's basic information.
- Click the
 Set up the elements of the structure button to complete the file structure setup.
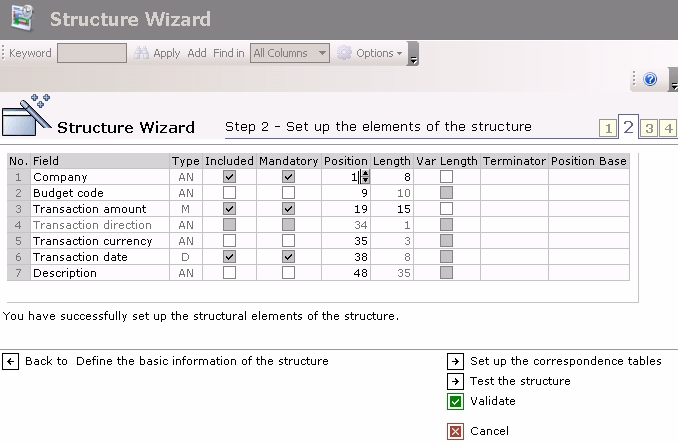
The setup page for the fields of each record, opens up.
Info
Si vous cliquez sur le bouton  Annuler, le paramétrage en cours est annulé et la liste des structures de fichier paramétrées est ré-affichée.
This page enables you to set up seven fields for each entry, corresponding to the seven information types on a transaction.
![]() View the data description of the file to set up
View the data description of the file to set up
- Specify the field settings of each entry in the file.
- Click the Set up the correspondence tables button to go on with the setup.
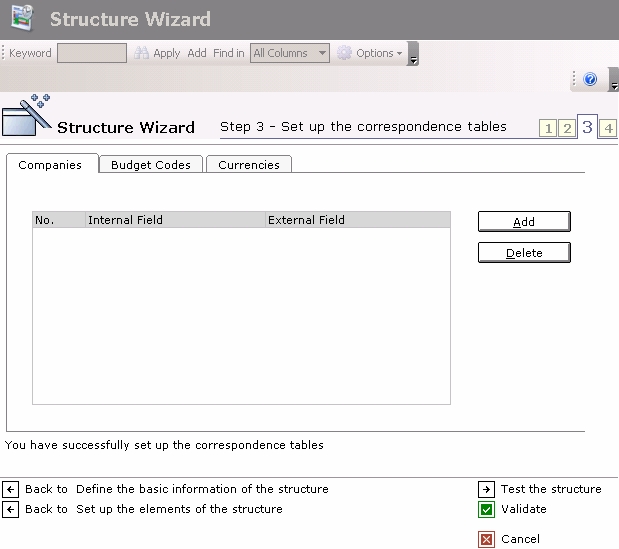
The setup page for the correspondence tables is displayed.
- If the codes of companies, currencies and budget types are the same as the ones in the database, click the Test the structure button to avoid this step of the setup and go directly to the structure test.
- To avoid the structure test and validate the setup straight away, click the
 Validate button.
 - To cancel the current setup and redisplay the list of the set up file structures, click the Cancel button.
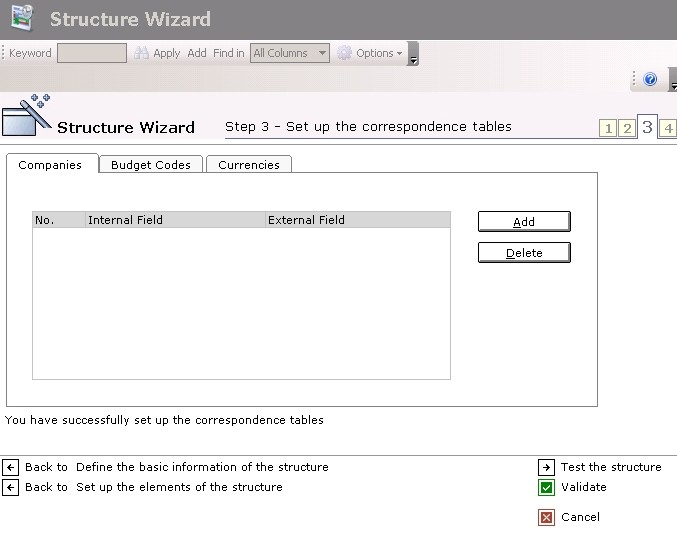
This page consists of three tabs which enable you to set up the relevant correspondence table: Companies, Budget Codes or Currencies.
Each tab contains a three-column table.
- The first column called N°, shows a number that identifies each correspondence.
- The second column called Internal Field, shows the codes saved in the database of Sage XRT Treasury.
- The third column called External Field, shows the codes saved in the file.
- Click a tab, and click the Add button to add a line of equivalent values in the tab.
- In the line displayed in the table, click the button
 in the Internal Field column to select the internal code of the database. In the External Field column, enter the code in the file coming from the external system.
 - Click the Add button to add a new line or the Delete button to delete the selected line.
Re-do steps 7 and 8 as many times as required for the completion of the correspondence table, then follow the same process for the other tabs.
- Click the button Test the structure to test the setup on a file.
The structure test page is displayed.
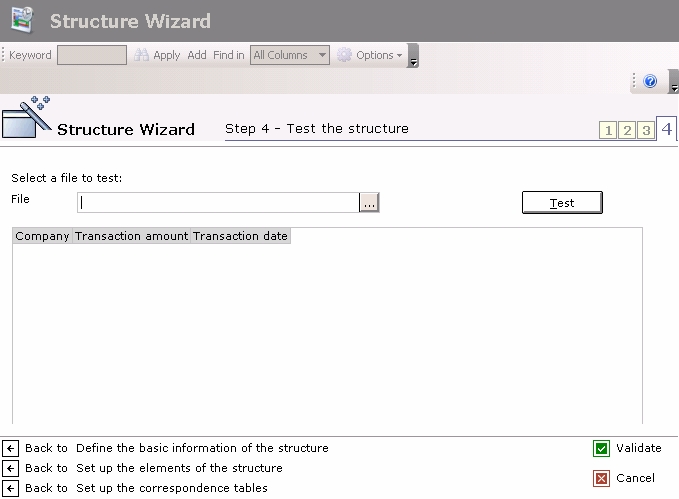
- In the File field, click the button to view the Liquidity browser and select a file to test.
A contextual menu appears.
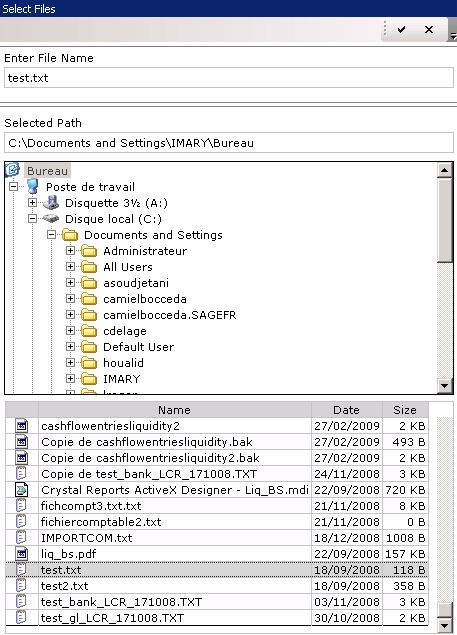
- In the browser, select the directory where the file is located.
The path appears in the Selected Path field and the files of the directory are listed in the table at the bottom of the window. - Double-click the name of the file to select it and click the
 button to validate the selection.
The wizard appears again and you can view the file path in the File field.
- Click Test.
The retrieved transactions are displayed in the table with, for each of them, the company code, the budget code, the transaction amount, its currency, the transaction date and the transaction description.
At the bottom of the table, the number of retrieved transactions is displayed.
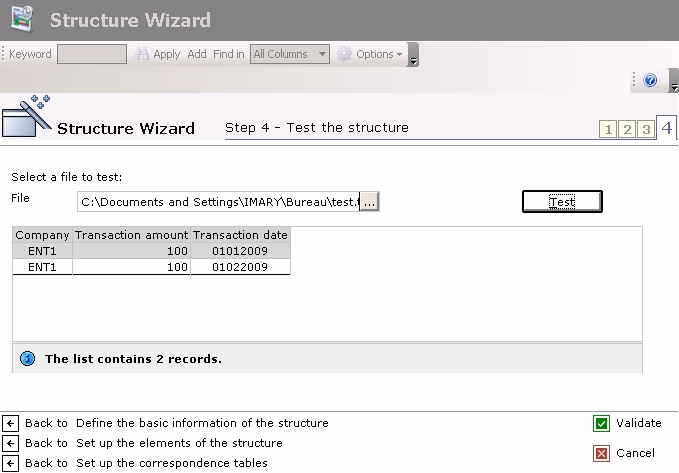
- Check whether the file matches the expected result regarding the transaction and value number in the fields. Correct the structure or the file if required.
- Once the test provides you with the right results, click the button Validate to validate and save the structure.
The setup page for file structures reappears with the newly saved structure at the bottom of the set up structures list.
You can go to the next step: the setup of the import terms.
You can create a structure by duplicating the settings of an existing structure.
- In the setup page for Structures, select the structure to duplicate and click the Duplicate button in the actions toolbar.
- The creation page for the structure completed with the settings of the duplicated structure opens up. An identifying number is automatically created for the structure by incrementation.
- In the Description area, enter the description for the new structure.
You can modify the settings of the duplicated structure.
For more information on these fields, please refer to the previous section.
You can enrich or modify the correspondences of values between file and database at any time.
- In the setup page for Structures, select the structure to modify and click the Modify the Equivalences button in the actions toolbar.
- The definition page for correspondence tables opens up, with the set up correspondences for the selected structure.
For more information on the fields in this page, see the topic describing the creation process for the import file structure.