Simple Reconciliation Rules
Simple rules are used to create a one-to-one reconciliation process between bank and GL entries. To do so, you need to set correspondences between the transaction codes from your GL file and the bank transaction codes.
Example
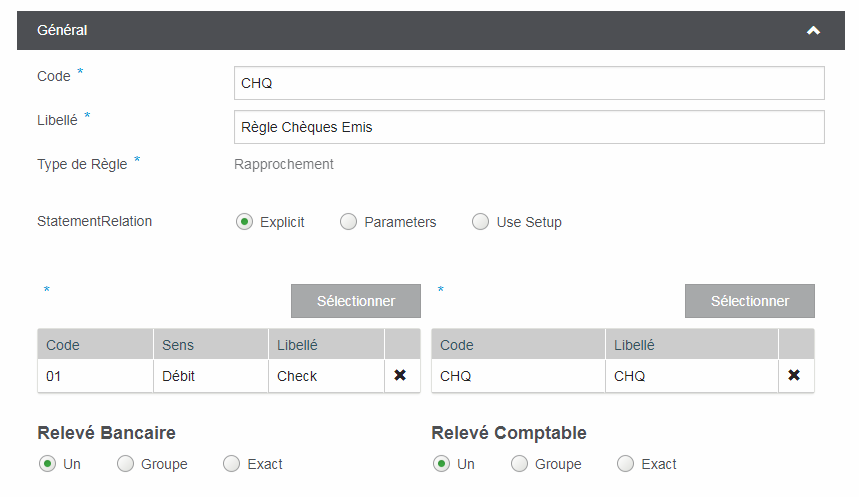
A GL entry generated with the Cheques transaction code will be reconciled with a bank entry using the 01 paid cheques code.
- In the Reconciliation menu, select Setup - Reconciliation Rule.
The Reconciliation Rule screen is displayed.
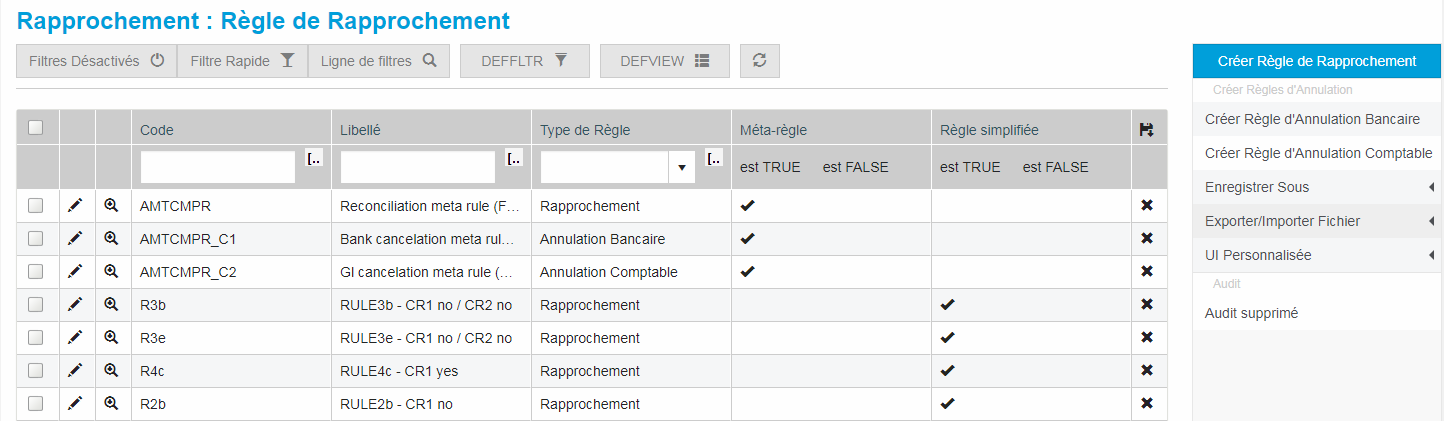
- Click the Create Reconciliation Rule button.
The Main tab from the creation form opens.
This tab displays four sections:
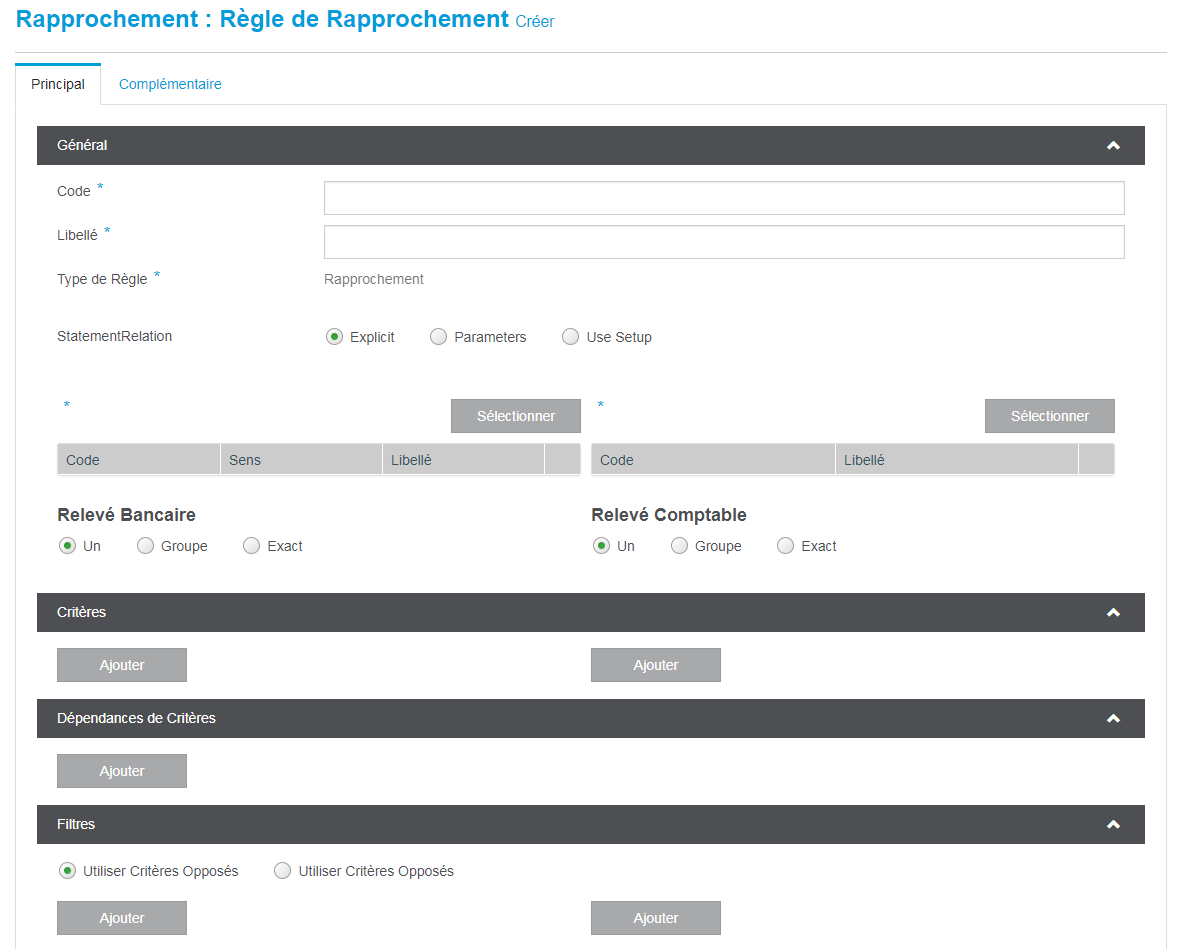
Info
Options Bank Transaction Codes: One and GL Types: One are selected by default. The Group and Exact options are used to create Advanced Rules.
- In the Code field, enter an identifier for the rule (free format).
- Enter its full name in the Description field.
- In the area called: Linked from, select one of the three options:
This standard type of reconciliation rule is based on the Bank Transaction Code - GL Type relationship and the Amount.
- Click Select on the left column, i.e. the Bank Transaction Codes section.
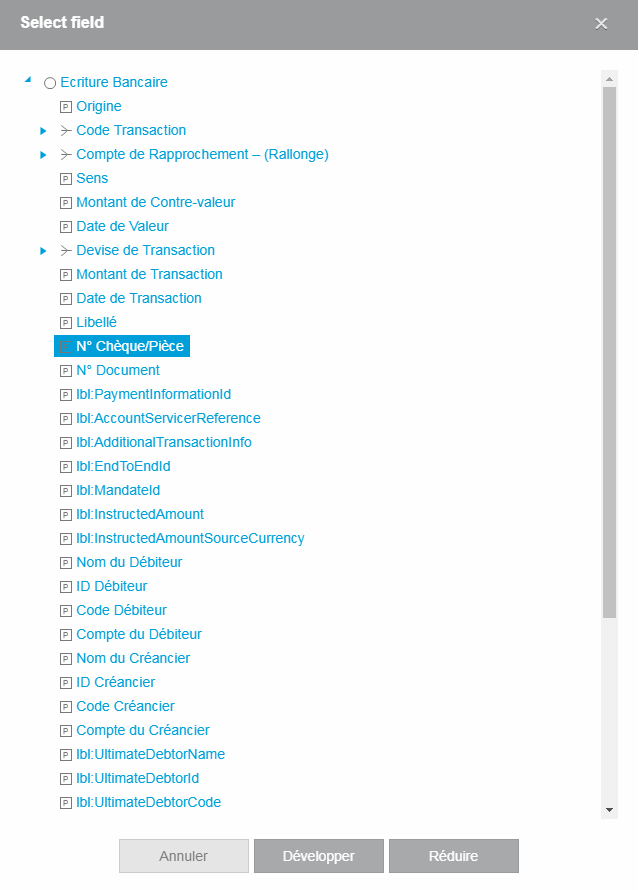
A selection window is displayed.
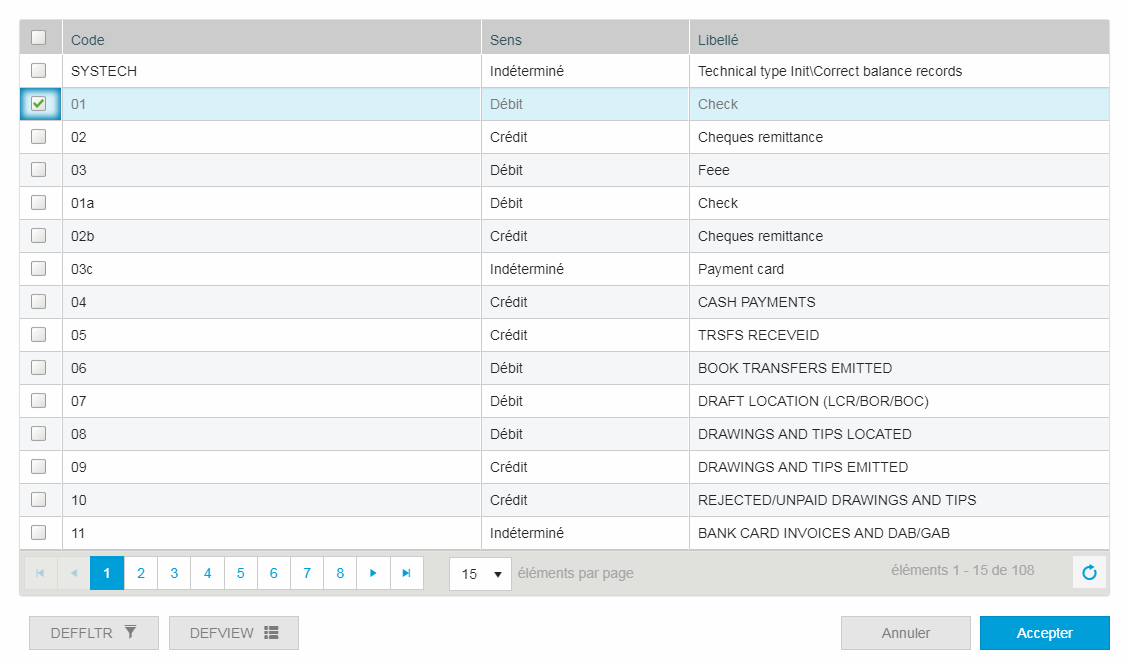
- Select the Bank Transaction Code that will match your Reconciliation Rule, then click Accept.
- Click Select on the right column, i.e. the GL Types section.
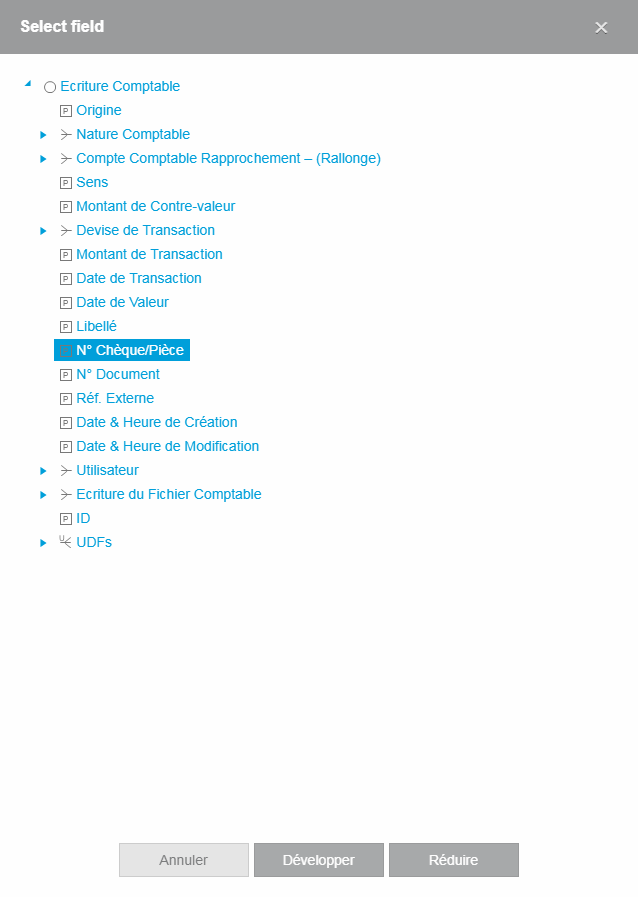
A selection window is displayed.
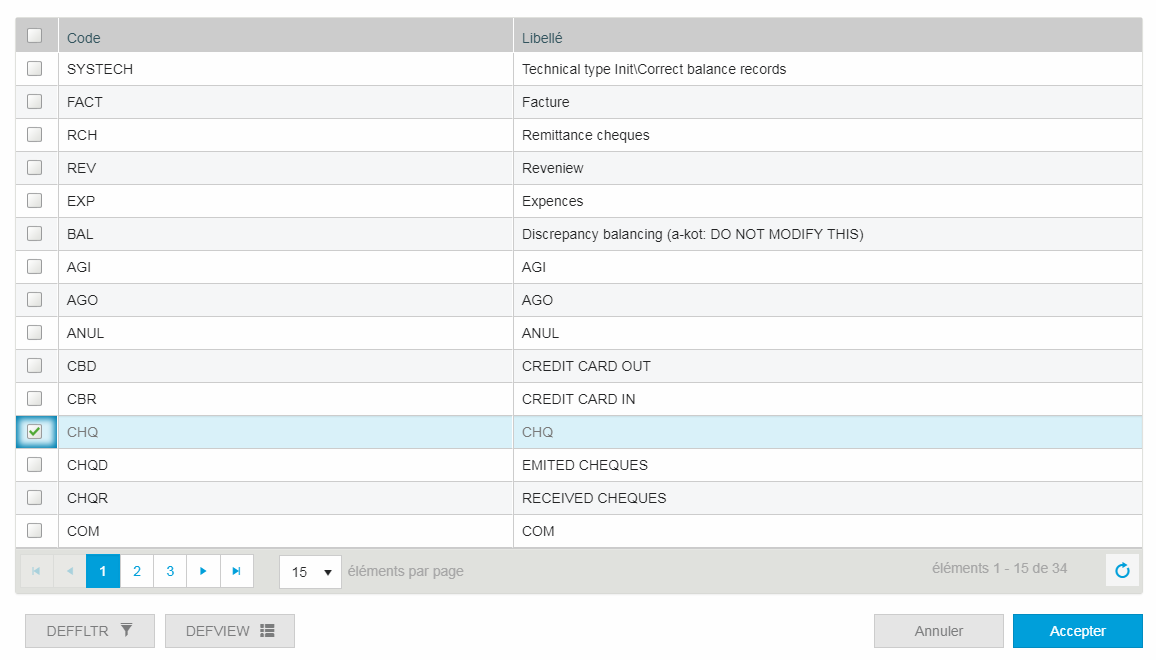
- Select the GL Type Code that will match your Reconciliation Rule, then click Accept.
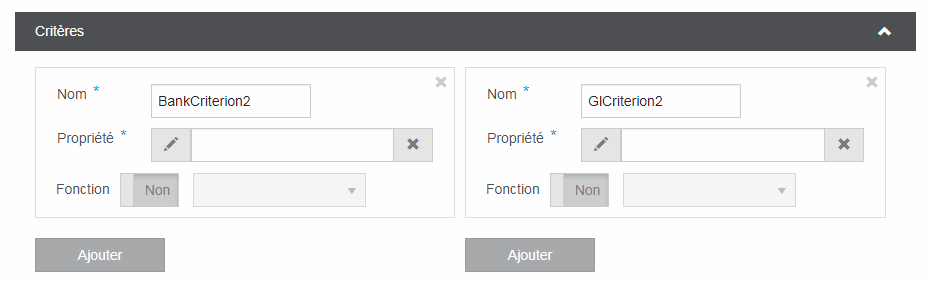
The setup of additional reconciliation criteria allow you to optimize the automatic reconciliation process.
- To add reconciliation criteria, click the Add button, in the left column for bank criteria and the right column for GL criteria.
Info
In a Reconciliation Rule, the number of additional criteria is unlimited.
- Enter a title for the criterion in the Name field, then click the edit button from the Property selection box.
- Click an element from the selection window to set the criterion.

The Function option can be used to refine the selection criterion by setting up a specific character string. Click the Yes/No button to enable/disable the option and select a Return Type in the drop-down list:
- Substring : enter the start position and the length of the string
- Trim : select the trimming sign and position (On the left, On the right, Both).
Once the reconciliation criteria have been set up, this section can be used to add mandatory or optional conditions.
- Click the Add button, then select one of your bank criteria in the first box.
- Select one of your GL criteria in the third box.
- In the second box, select the comparison operator to activate between the criteria:
- =
- >
- <
- >=
- <=

The criteria dependency is set to mandatory by default. Click the Yes/No button to make it optional.
- Click Save to complete the setup of your rule.